Goulet Mylar Paper (Set of 2 Sheets)
Goulet Mylar Paper (Set of 2 Sheets)
$5.50
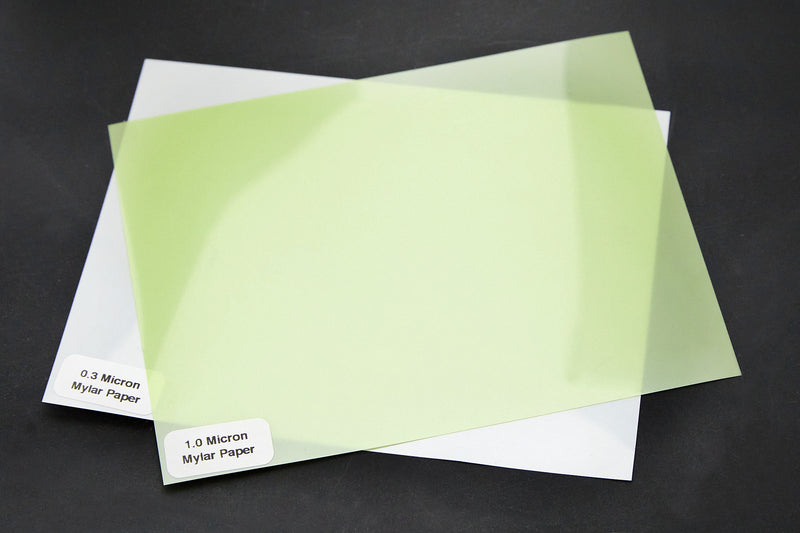
This pair of 4.25"x5.5" sheets includes one 1-micron (green) and one 0.3 micron (white) sheet of Mylar paper, which is a super-fine abrasive used to make your nibs write glassy-smooth.
It's always best to first check your nib for proper alignment before trying any nib smoothing remedies. Often a scratchy nib is simply a matter of one tine bent lower than another, and you can see this symptom with the aid of a loupe or other magnifying glass. If the tines are aligned and the nib still writes scratchy, then Micro-Mesh is often a good measure for more severe scratchiness. If your nib is writing satisfactory but you just want it to write a bit smoother, then you will likely benefit from the use of Mylar paper.
Using Mylar paper to smooth your nib is a bit of an art form, and may take some practice for you to be able to do reliably. It is not as aggressive a material as Micro-Mesh, so you will need to be patient when working with the Mylar. It's always best to take a conservative approach when working with any abrasive on your nib. Use a light touch and be very patient.
Only one side of the Mylar paper is abrasive. You'll notice that the paper itself doesn't feel very abrasive to the touch, that's because 1-micron and 0.3-micron particles are pretty dang small. It's often hard to tell which side actually has the abrasive on it. You can tell most easily by reflecting a light off the Mylar, the shiny side is the non-abrasive plastic backing, and the duller side is the abrasive side that you will use to smooth your nib. Put the shiny side down on your desk, and the dull side up.
Hold your inked-up pen as you normally would, and lightly make figure-8 patterns about 10-15mm tall on a paper of your choice. It's best to use a smooth paper for this, but that's up to you. If your nib feels consistent (not scratchy at any particular point) but simply has more feedback than you would like, then it's time to break out the 1-micron Mylar paper. (If it does actually feel scratchy, you may want to consider Micro-Mesh as a precursor to Mylar, as it's more aggressive at fixing scratchy nibs). Have your sheet of Mylar next to your paper, on a flat and stable surface. Make the same figure-8 pattern on your Mylar as you did on your paper, applying very light pressure and going fairly slow. You will want to keep even pressure throughout the figure-8. It's best to only do a few figure-8's at a time on the Mylar before checking back on your paper. If you want it to feel smoother, then keep repeating this process until it feels as smooth as you like, then stop. If you find after several cycles of this with the 1-micron Mylar that it's just not quite as smooth as you'd like, then you can repeat the same process with the 0.3-micron Mylar.
WARNING: Using an abrasive like Mylar paper to smooth your nib voids just about every pen manufacturer's warranty, so make sure you're only working on pens that are out of warranty, or that you're confident you will never need to have serviced by the manufacturer or returned to the retailer. It's best to practice on inexpensive pens that you don't mind screwing up if things go bad.
- Condition
- New
- Brand
- Goulet
- Type
- Accessories
